Sand Cast Tea Light Holder
A few weeks back, I helped my son make a sand cast plaster paper weight. I came out so well, I’ve been itching to make my own sand cast plaster project since then. I finally settled on attempting a sand cast tea light holder. Simple enough in theory but some of the details and materials took me a bit to figure out.
The first step for me was finding the right sand. Clean, sandbox sand was too fine and too lightly colored for what I wanted. For this project, I wanted something that looked more natural. I ended up on the concrete aisle with a 60 pound bag of Sakrete all-purpose sand. Normally I’m a big fan of snagging those big brown bags of “reclaimed” sand and rocks, but I didn’t want to risk dirt and other nastiness ending up on the final piece, so I sucked it up and paid the full $5.
The next hurdle was deciding how to make the indent to hold a tea light. I went back and forth on this one. I considered just placing a tea light in the sand and casting around it, but I didn’t want to risk the plastic or metal bit getting permanently stuck in the plaster. I also toyed with the idea of getting a glass votive holder and intentionally casting it to stay in the plaster, but it just wasn’t the look I was going for. I decided I would cut a 2″ x 4″ piece of lumber and drill a hole in it, press it into the sand. But I don’t like putting out power tools with the toddler around and I didn’t feel like waiting to have a chance to cut it.
In the end, I used a votive holder, pressed it into the sand to then patted sand down around it until I got the shape I wanted. I pressed my shells into the sand and, just before I was ready to pour the plaster, I removed the votive holder and gentle patted the sand to smooth it a bit.
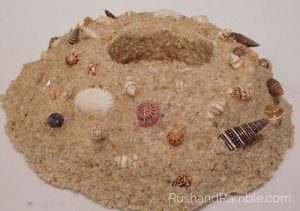
I’m pretty happy with how the cast came out, though I do still want to try a 2″ x 4″ at some point. I figure that method will be much better for making faster imprints and consistent shapes.
Sand Cast Tea Light Holder
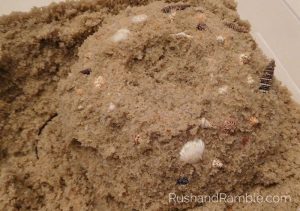
Pour dry sand into a pan, plastic bin, or other waterproof container. Avoid cardboard as it can get soggy and fall apart. Make sure the container is deep enough to accommodate your casting and then some. Add water to the sand and mix thoroughly. The sand texture should be damp and clump when balled in your hand, but not soggy. If the sand is too wet or too dry, it won’t hold the shape well. Aim to get a perfect sand castle consistency.
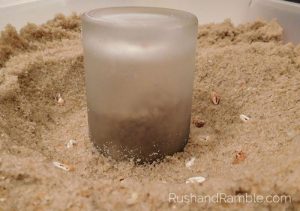
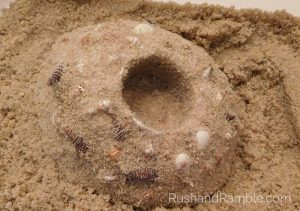
Once your sand is the right consistency, place a votive holder in the sand upside-down and press firmly into the sand. Make sure you press at least 1 1/2″ to 2″ deep to allow enough space for the votive to rest in the holder plus a layer of plaster underneath. Gently press out from the votive holder, forming the shape of your holder.
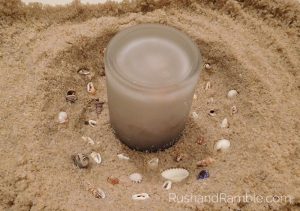
Once you have the desired shape, begin pressing shells, rocks, stones, and any other decorative items into the sand. Play with the angle, direction, and depth a bit, just make sure a bit of the item is still exposed so it will cast firmly in the plaster.
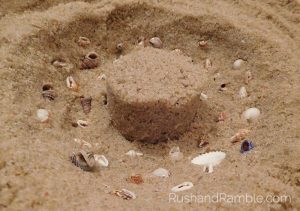
Once you’ve finished adding shells and other bits and pieces, carefully remove the votive holder. Gently pat and smooth the sand while maintaining the shape of the inside the votive holder.
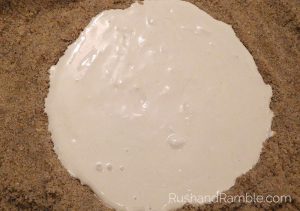
Mix the plaster according to the directions on the box. I used DAP Plaster of Paris, which calls for a 1 to 2 ratio of water to plaster. In my experience, this is pretty standard, but it’s best to read the packaging to be sure. Slowly and gently pour the plaster mix into the sand taking care to not disrupt the mound of sand in the center. Let the plaster sit at least 30 minute to 1 hour, depending on it’s size and thickness.
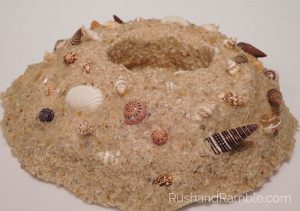
Once the plaster has set, gently lift the plaster out of the sand and flip it over. Wipe off excess sand back into the container then run under water to remove the remaining loose sand. Be gentle during this step and use low water pressure. If you scrub too hard or spray with high pressure water, you’ll remove all of the sand. This is great for some projects, but in this case you want the sand to stay put.
Once you’ve removed loose sand, spray the piece with a clear coat. I use a gloss because I like the shine it gives the shells, but you can use any finish you like. This clear coat will help the sand stay in place and give a nice finish. You can also sprinkle on glitter at this point, if you’d like. Again, follow the instructions on the can, use in a well ventilated space, etc.
Let the clear coat dry based on the instructions on the can and keep in mind plaster can take quite a while to fully cure. Refer to the packaging for information specific to your project. While it dries, be careful to leave it on a surface that won’t be damaged by moisture. I usually set mine in the garage on top of the trash bin lid since it can’t do much damage there.
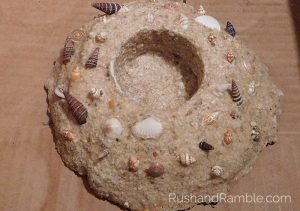
Once your sand cast tea light holder has fully dried and cured, simply add a tea light and enjoy.